- Web hosting
- Services
- Help
Knowledge base
VNC and uploading an ISO-image to a server
Connecting to a server through VNC
Go to your Client Area, find Products — Virtual private servers — Products, choose the server you need and click on the To panel button on the toolbar.
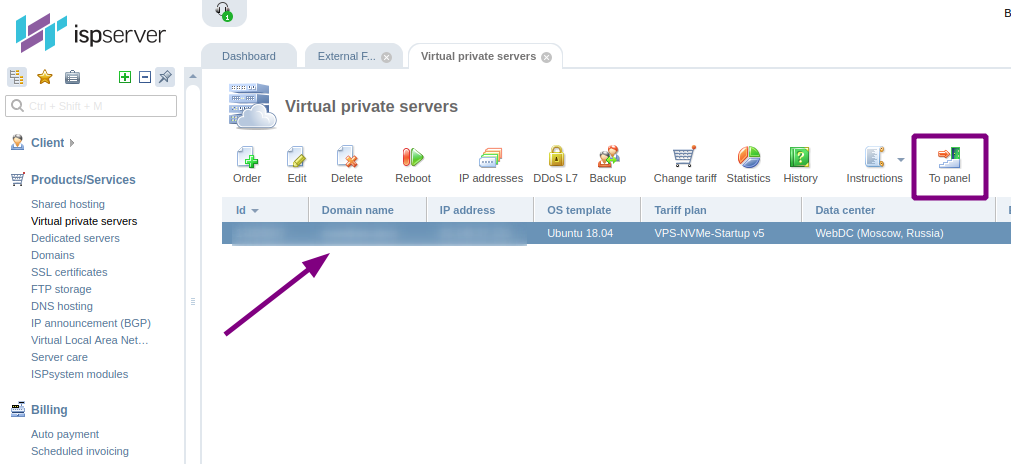
The VMmanager control panel will be opened in a new tab.
Your server can use either the 5th or 6th version of the VMmanager panel. Depending on the version, the procedure for your server will be different.
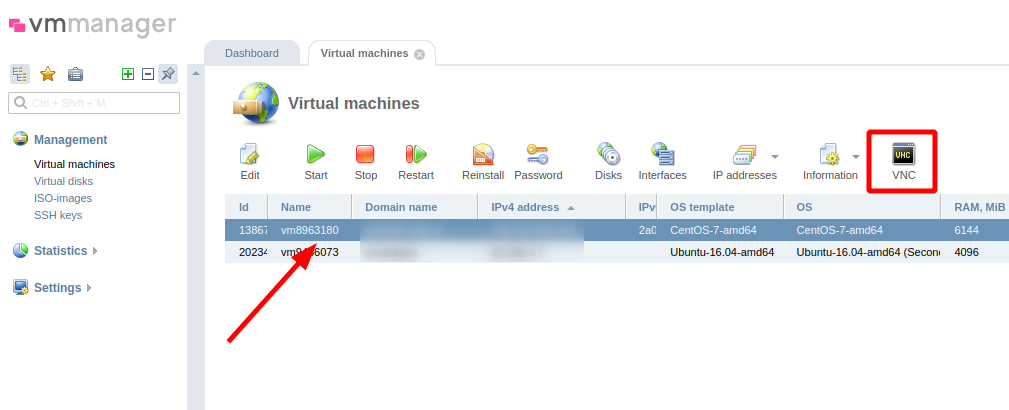
In VMmanager 5 panel, go to Management — Virtual Machines, select the server and click on the VNC button on the toolbar.
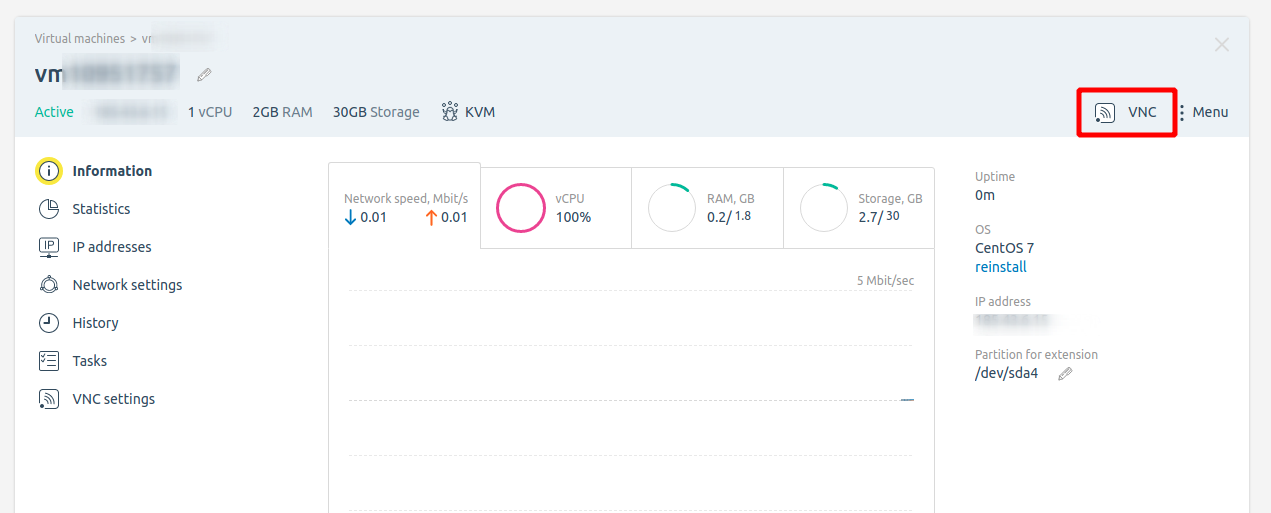
In VMmanager 6, go to Virtual Machines, select the server and click on the VNC button in the upper right corner.
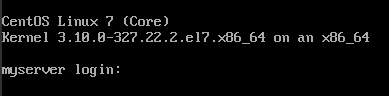
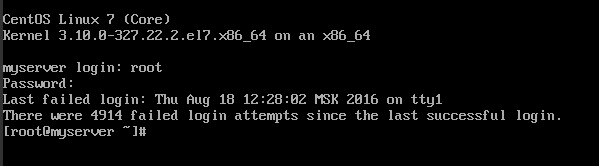
A command prompt will be opened in a new browser tab. You'll be offered to enter a username and password to connect via VNC.
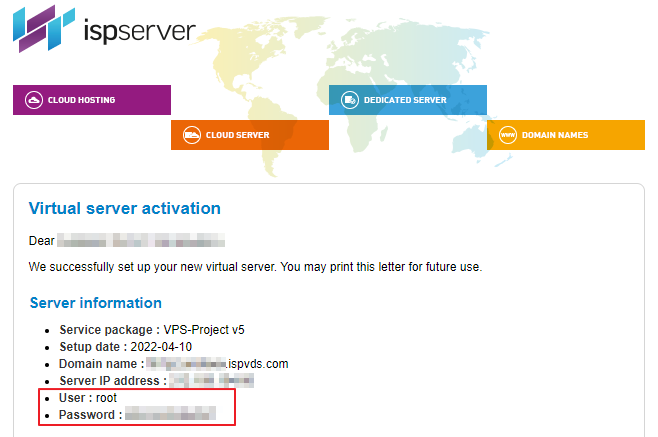
You can find these credentials in your Client Area, go to Products — Virtual private servers — select the server and click the Instructions button on the toolbar.
Enter the login, then the password. Please note that the password is not displayed in any way on the command line, i.e. you need to enter it and press Enter.
Uploading your own ISO-image
Uploading your own image is only available in the VMmanager 5, while the image size should not exceed 2 GB.
If the size of your image is larger than 2 Gb or if your server is managed in the VMmanager 6 panel— we will help you to upload the image. Just send a ticket to our support service and provide a direct link to download the image.
The image will be available within 24 hours from the moment of uploading. Please note that you can't upload more than 2 images at the same time.
Uploading an ISO-image in VMmanager 5
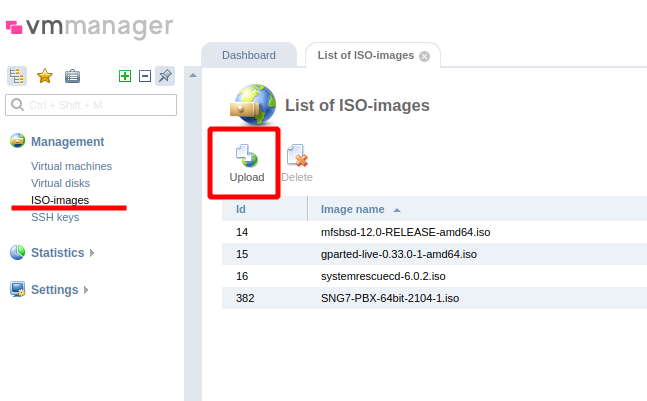
Go to Management — ISO images and click on the Upload button.
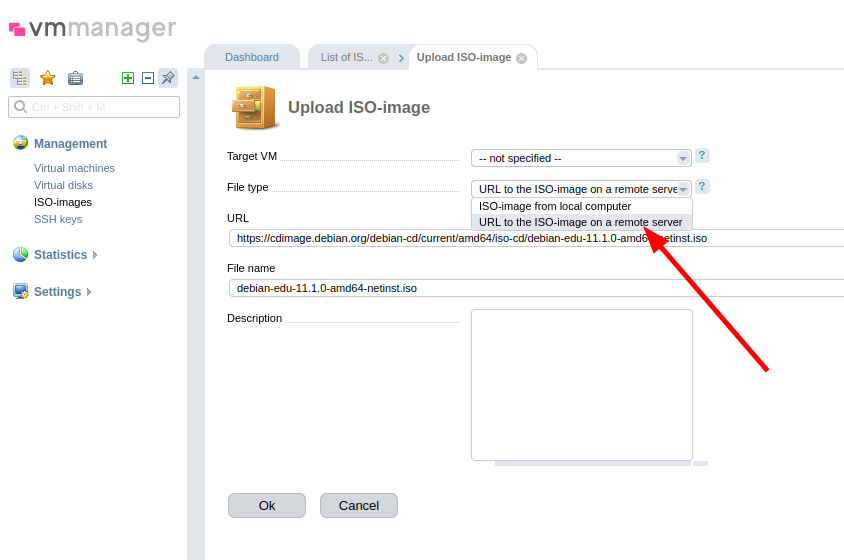
Select the file type — the image can be downloaded from your local computer or via a direct upload link. Select the file or specify the URL to upload it, click OK.
When the image is uploaded, go to Management — Virtual Machines, select the server and click on the Stop button.
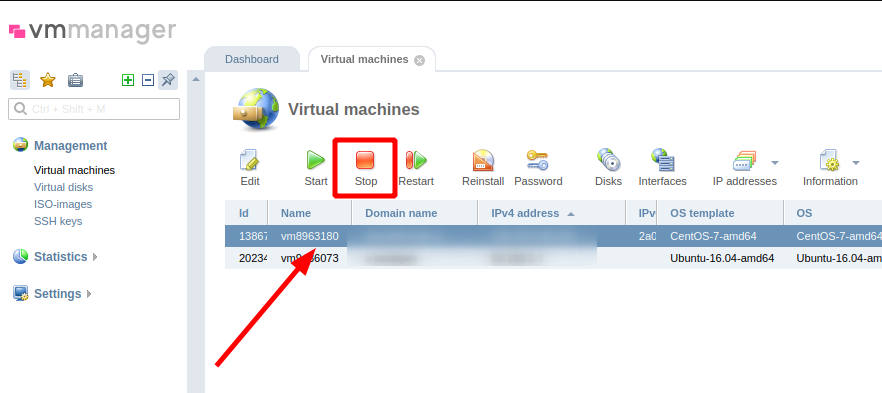
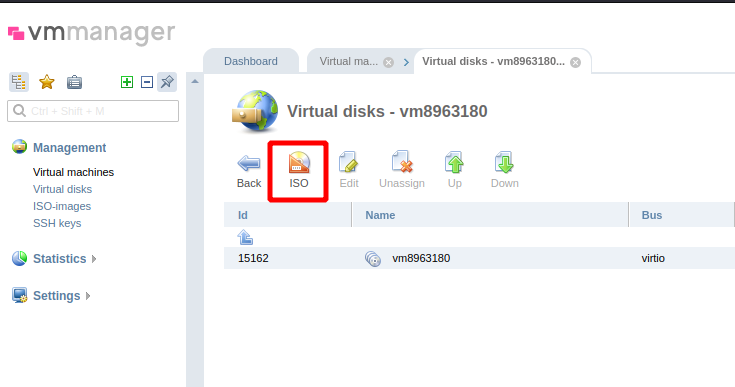
Your server will be stopped, then click the "Disks" button.

Click on the ISO button without selecting any disks.
Select the image name from the list and select To the beginning in Boot priority.

Start the virtual machine by clicking on the Start button in Virtual Machines. Go to VNC to work with the uploaded image.

Please note that uploading Windows OS is only available from our templates with the purchase of a license.