- Web hosting
- Services
- Help
Knowledge base
ImunifyAV antivirus for ISPmanager control panel
ImunifyAV is a website antivirus developed by Revisium team to find and cure any malicious script in just a single click.
It supports WordPress, Joomla!, Magento, Drupal, MODx, Bitrix, other php CMS, and static html websites as well.
Its former name is Revisium Antivirus (before version 5.182)
- Installing the antivirus
- Buying the license
- Configuring the system
- Manual checking for viruses
- Curing the threats discovered
- Checking domains for sanctions
Before installing, please make sure that:
- Your ISPmanager is updated to the latest version,
- The use of the putenv and passthru functions is allowed for PHP 7.1. Go to the
PHP Settingssection — select PHP version 7.1 —Advanced Settingsand make sure that «putenv» and «passthru» are missing in the «disable_functions» variable.
Important! When installing the antivirus, the PHP 7.1 version with the ioncube, posix, intl, json extensions will be installed automatically.
Type of licensing:
- Free version.
- Premium version.
|
|
Free version |
Premium version |
|
Manually starting file checking |
+ |
+ |
|
Checking domains reputation |
+ |
+ |
|
Report on threats found |
+ |
+ |
|
File curing |
- |
+ |
|
Sending a report on threats found by email |
- |
+ |
|
Configuring resources consumption |
- |
+ |
|
Checking for blocks in more than 50 antivirus databases |
- |
+ |
|
Configuring a schedule for checks |
- |
+ |
|
Cancellation of the performed treatment |
- |
+ |
|
Storing source files after performing a treatment |
- |
+ |
|
Manually checking of a separate user or website |
- |
+ |
Installing the antivirus
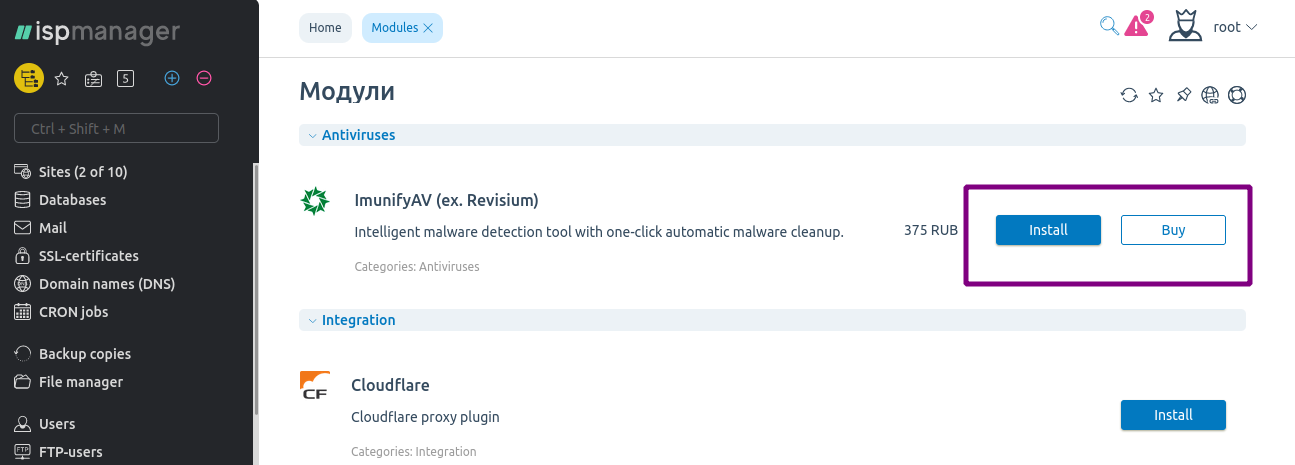
In ISPmanager 6, ImunifyAV is available by default. You can install or delete it in the Modules section.
Buying the license
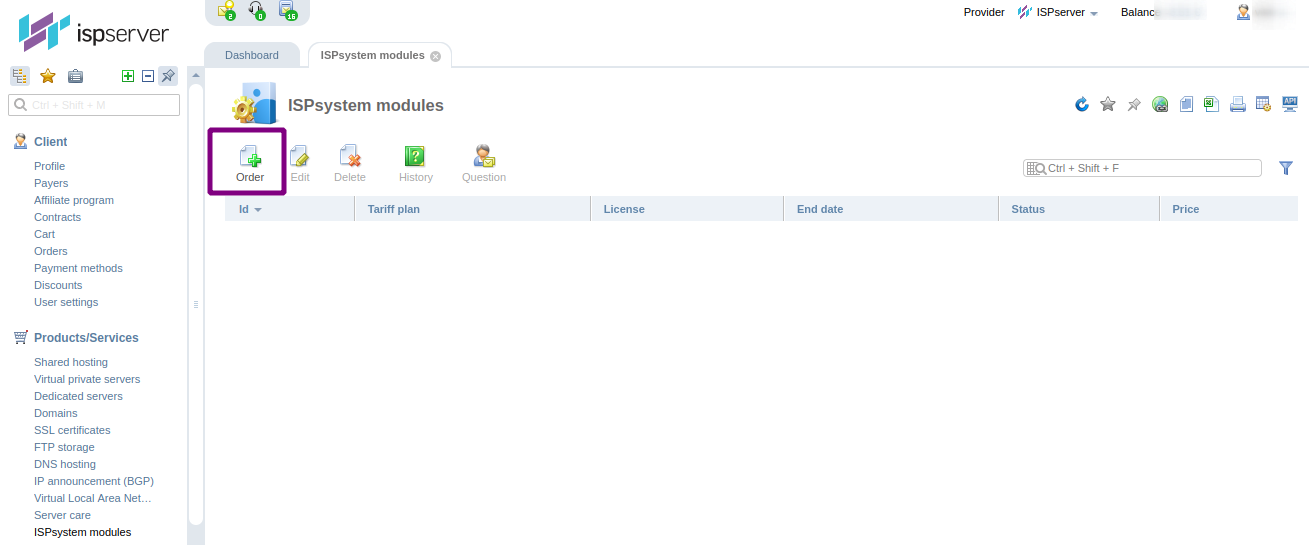
You can purchase the premium version of ImunifyAV antivirus (ex. Revisium) in two ways: in the ISPmanager panel or directly through your personal account at my.ispserver.com.
In ISPmanager panel::
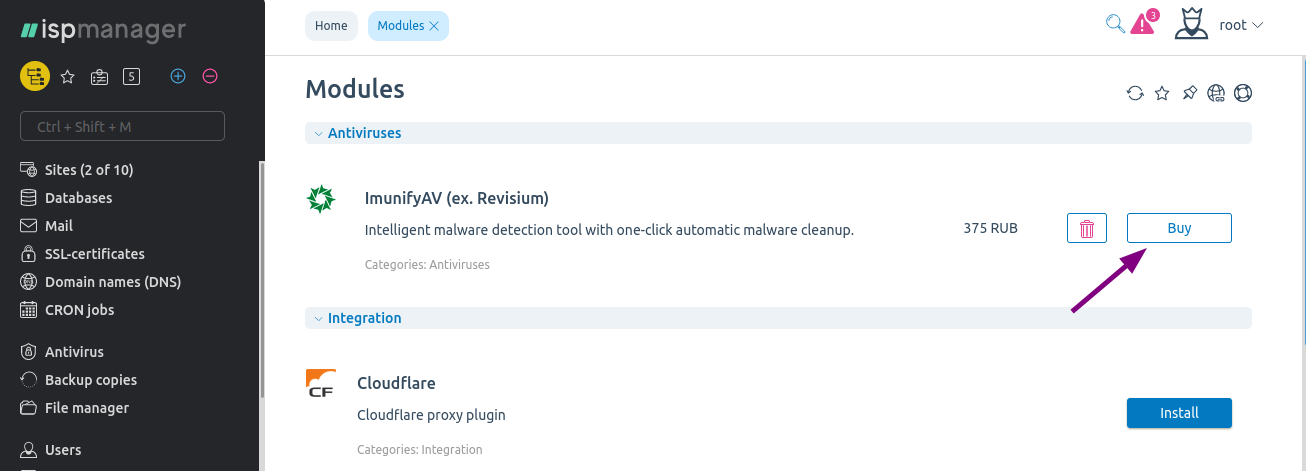
- Go to the Modules section;
- In the Antiviruses section find
ImunifyAV (ex. Revisium)and click on theBuybutton.
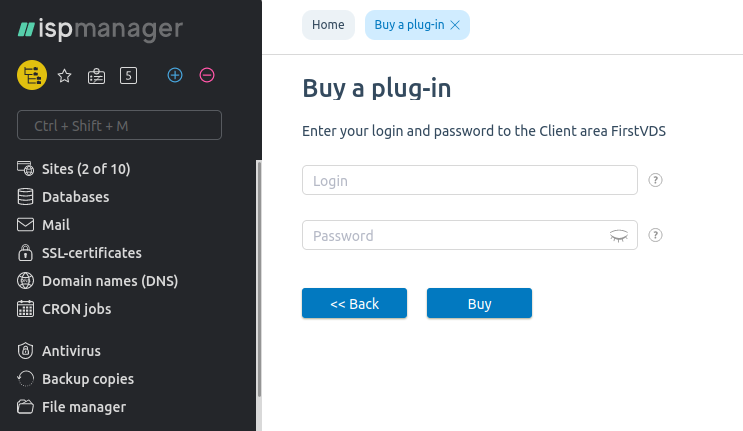
- Enter the login and password of your personal account and click
Buy.
- You'll be redirected to the shopping cart, click the
Paybutton there.

- Select the payment method and press
Pay. - Go back to ISPmanager. If the service is enabled successfully, you will see the message:
The service is ready for use.
In your personal account at my.ispserver.com:
- In your Client Area, open the
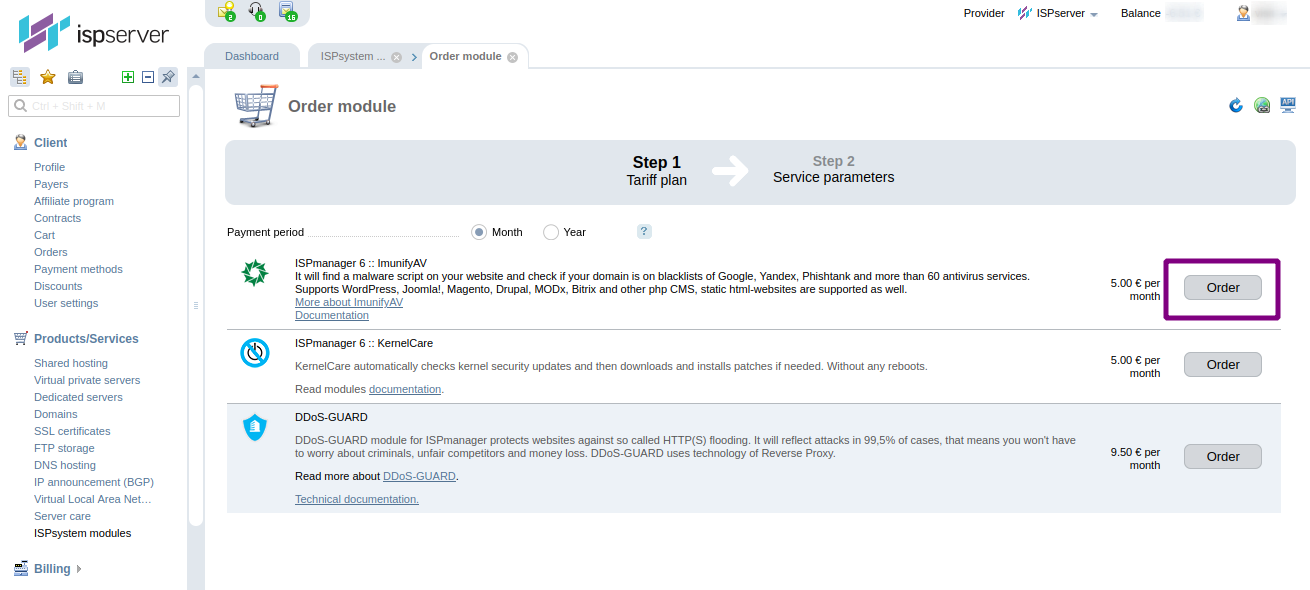
Productssection —ISPsystem Modulesand click on theOrderbutton.
- Select ImunifyAV antivirus (ex-Revisium Antivirus) and click
Order.
- Enter the
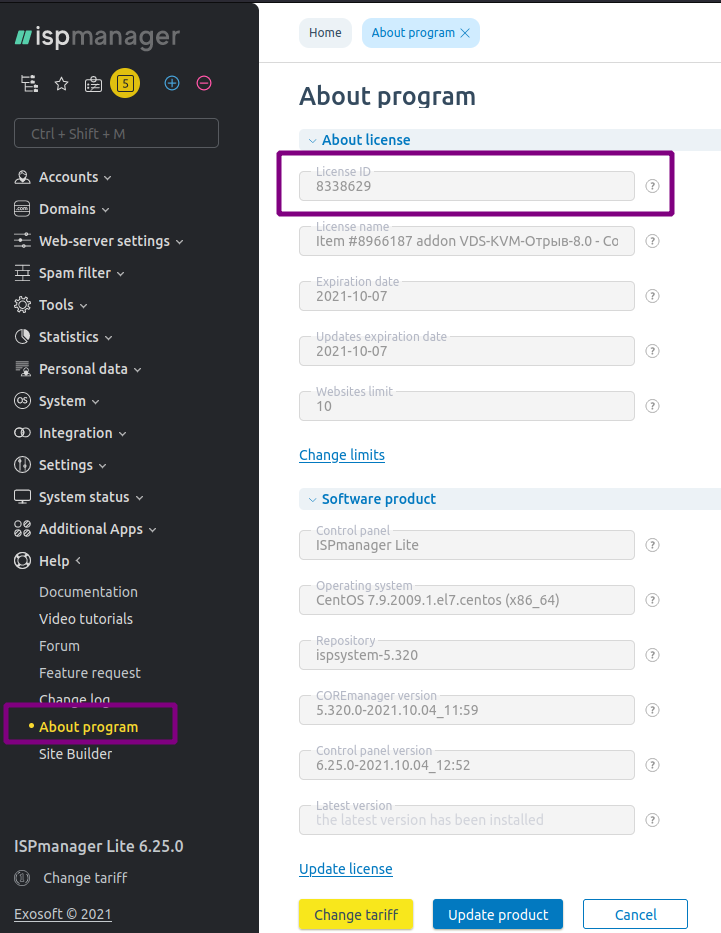
License IDof your ISPmanager. You can find it in your ISPmanager panel by pressing theAbout programbutton in theHelpsection.
- Enable auto-renewal if necessary and click
To shopping cart.

- Go to the Shopping Cart, click the
Paybutton.
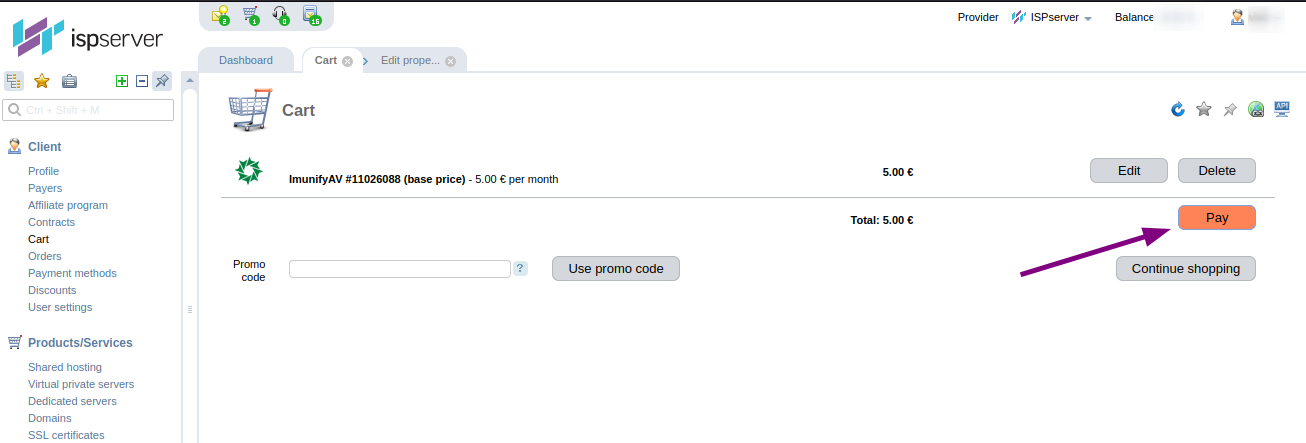
- Choose a convenient payment method and pay.
- Go back to ISPmanager. If the service is enabled successfully, you will see the message:
The service is ready for use.
Configuring the system
To configure the antivirus:
- Go to the
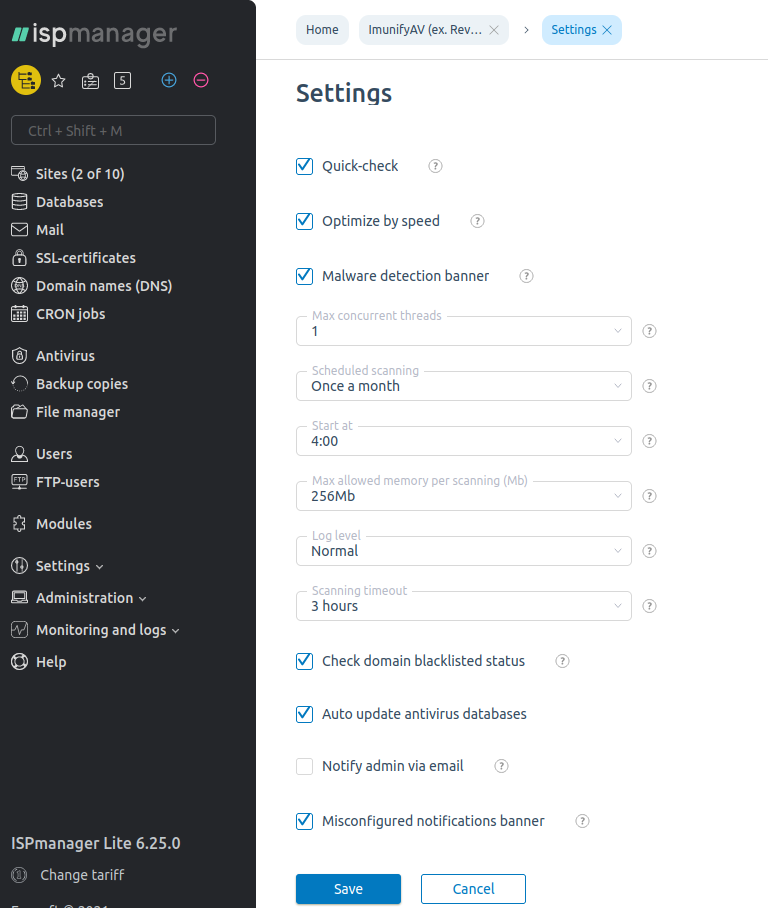
Antivirussection — press on theSettingsbutton.
- Configure the types of files to be scanned:
- For a quick check, enable the
Express checkoption. Scanning will be performed only for files with ph*, html*, js, txt, tpl extensions and other critical files. At the same time, the scanning time and the load on the server will be reduced significantly. - For a full check, disable the
Express checkoption. Please note that the scanning may take a long time. To exclude files with media format and document extensions from scanning, enable theDo not scan media filesoption. To verify the selected files from the cache directories, enable theOptimize by speedoption. It will reduce the scanning time significantly without compromising the quality of security threats identifying.
- For a quick check, enable the
- Specify how many scanning threads are allowed at the same time. Threads run parallel to each other. Available values are: «1», «2», «4». Optimal value: 0.5*number of CPU cores. If your server has two or one processor core, the optimal value will be «1» thread.
- Specify the maximum amount of RAM allowed per thread. It defines the amount of RAM for a single thread. Available values: «256Mb», «384Mb», «512Mb», «1024Mb».
- Select the Logging Level to change the level of detalization of messages in the log. Available values are: «Normal», «Full».
- Select
Maximum scan time per website. It determines the time after which the website scanning stops. Available values are: «1 hour», «3 hours», «12 hours», «24 hours», «Unlimited». - Enable the
Check domain for sanctionsoption to check if your websites and their IPs are on the black lists. - Enable the
Auto-update antivirus databasesoption to keep ImunifyAV databases updated. - Configuring automatic scanning:
- In the
Scheduled Scanfield, select the time interval after which the scan will be started. In the free version only two values are available: «Disabled» and «Once a month». In the paid version, you can choose from four options: «Disabled», «Daily», «Once a week», «Once a month». - Select the exact time when the automatic scan starts in the "Run scan at" field.
- Enable the
Notify about viruses by emailoption to receive notifications when viruses are detected. Enter your email address for notifications. - If you want to use an external server to send notifications instead of the standard one, enable the
Use external SMTPoption. Enter the credentials for connecting to the SMTP server. SMTP server is an address of an external server. SMTP user is a login for authorization. SMTP password for authorization. SMTP port for connection. Enable theUse SSL for SMTPoption to use the SSL protocol to connect to an external server. An SSL connection is required, for example, to send notifications via an smtp server. The field is available when the option is enabled.
- In the
- Configure banners displaying:
- Enable the
Site Infection Banneroption so that ISPmanager notifies you if viruses are found during a scan. - Enable the
Unconfigured notifications banneroption so that ISPmanager notifies if the virus notification via email is not configured.
- Enable the
- Specify the period of storing the original versions of files after the site's treatment in the
Store copies of cured files (days)section. This option is only available in the paid version. Available options are: «7», «14», «30». - Enable the "Reset malicious file" to treat files safely instead of deleting them. It guarantees the site's operability after automatic treatment for those cases when malicious code is connected to another file or database via include. This option is only available in the paid version.
Manual checking for viruses
ImunifyAV antivirus has two scanning modes: by users and by domains. The mode can be changed by pressing the corresponding button: By domains or By users.
Scanning by users:
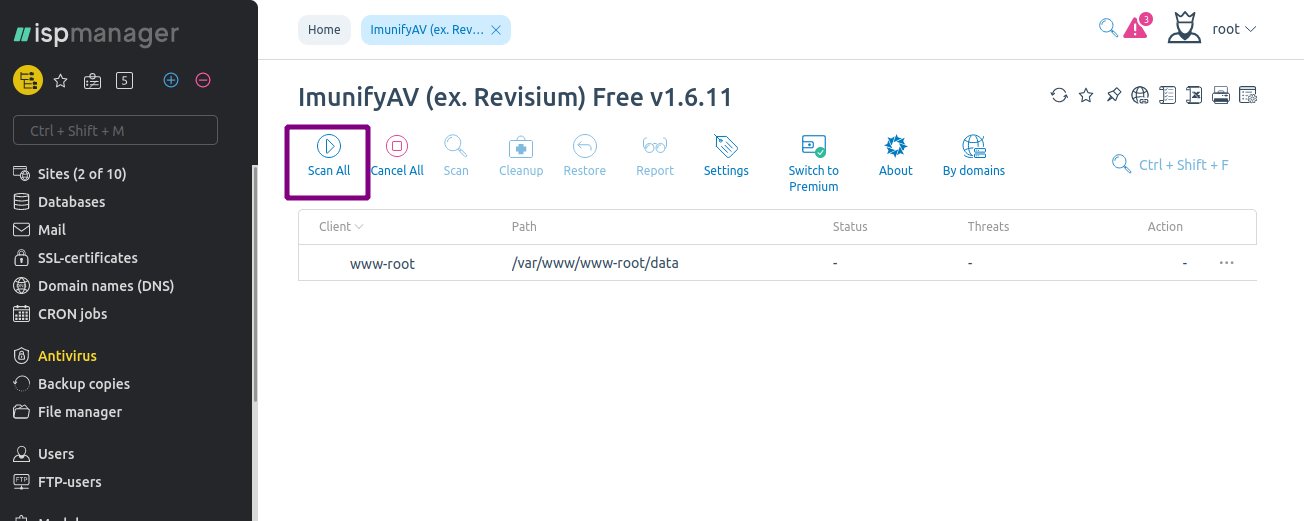
This mode allows you to check the files of a specific user for viruses. All system files of this user and files of his websites will be checked. You can run a scan on all users at once or check them selectively. You can also interrupt the scan if necessary.
- To run a scan, go to the
Antivirussection. - Select the user you would like to scan for viruses and click on the
Scanbutton. You can also scan all users for viruses with theScan allbutton.
Scanning by domains:
This mode allows you to check the files of a specific website for viruses. Only the website files will be checked, the users' system files won't be affected. You can run a scan on all websites at once or check them selectively. You can also interrupt the scan if necessary.
- To run a scan, go to the
Antivirussection. - Select the website you would like to scan for viruses and click on the
Scanbutton. You can also scan all websites for viruses with theScan allbutton.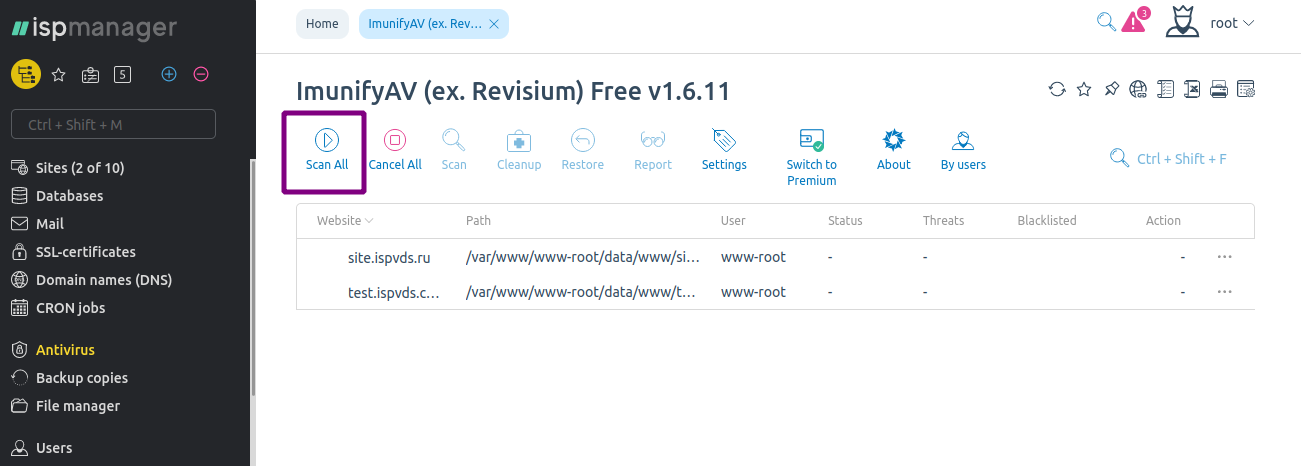
Curing the threats discovered
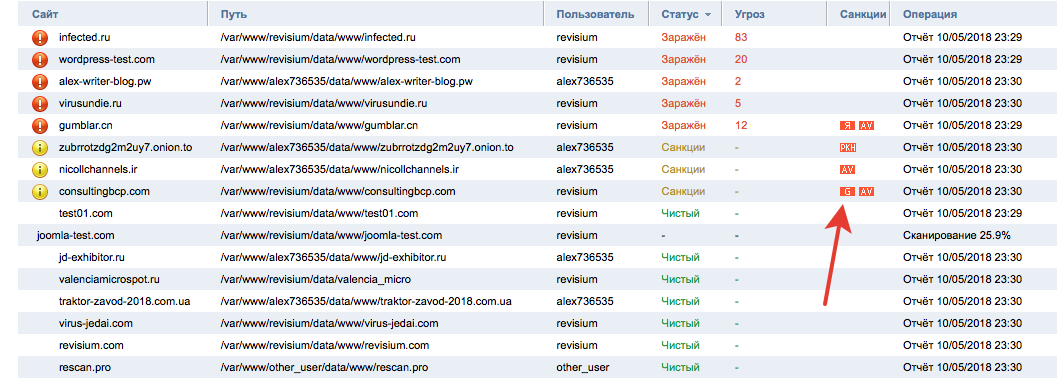
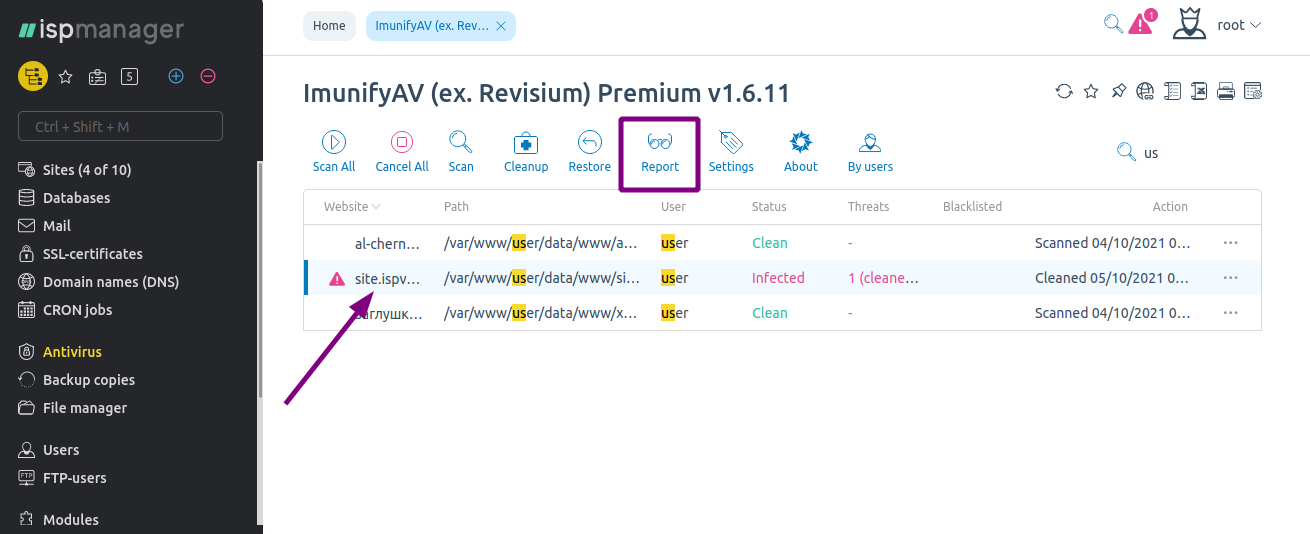
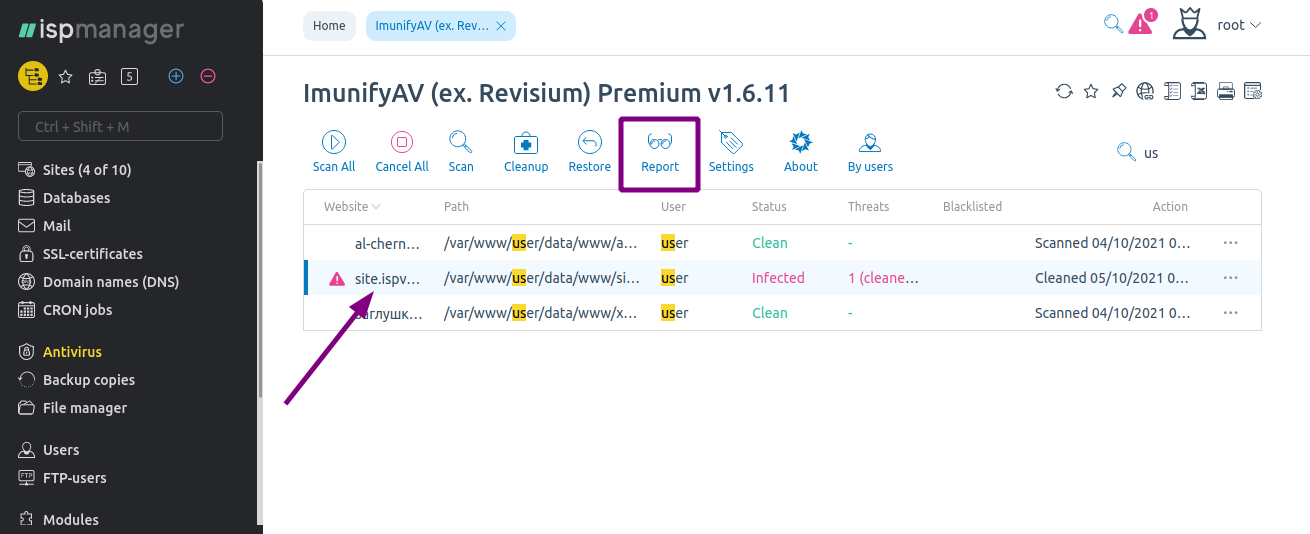
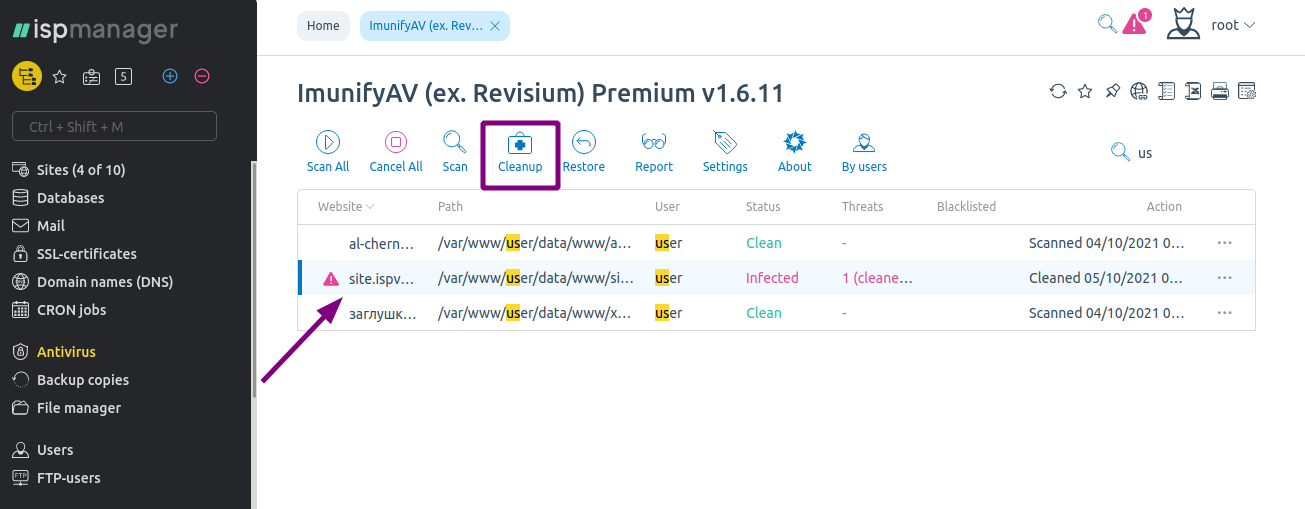
When scanning is completed, you will receive a report on the status of websites or users. If a user of a website is infected it will be marked as "infected" with the number of threats found in the status column. The premium version of the antivirus allows you to perform automatic treatment of detected threats.
- Select an infected user or website
- Click on the
Cleanupbutton to cure all threats automatically.
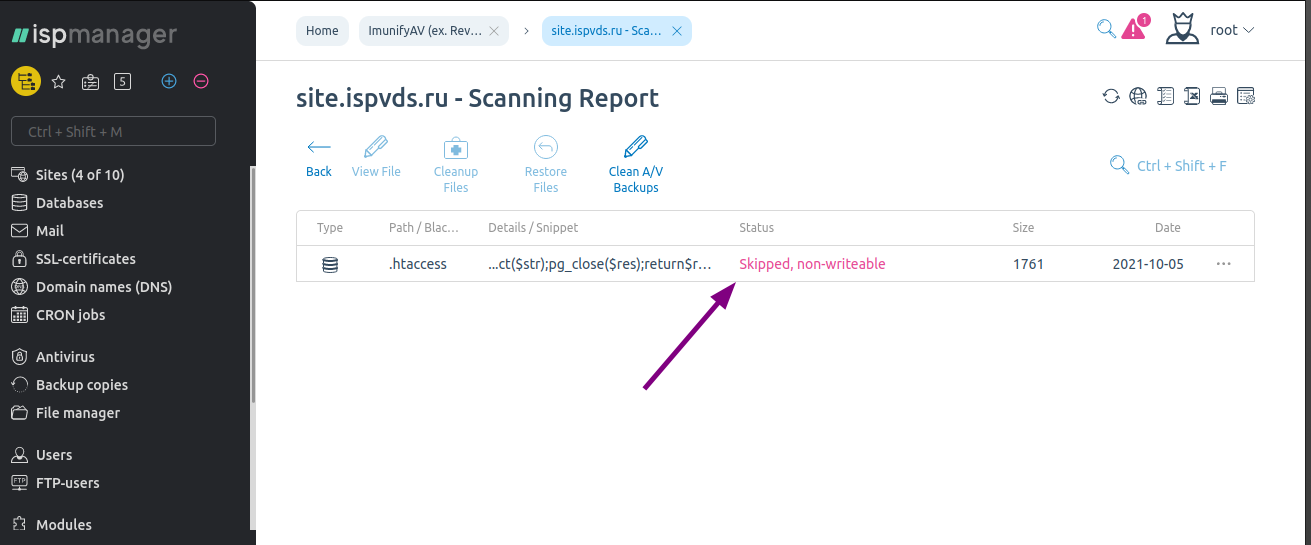
Sometimes not all threats can be cleaned up. In this case:
- Go to the list of discovered threats by clicking on the
Reportbutton.
- The status field will describe the reason why a file cannot be cured for every untreated threat.
Treatment cancellation:
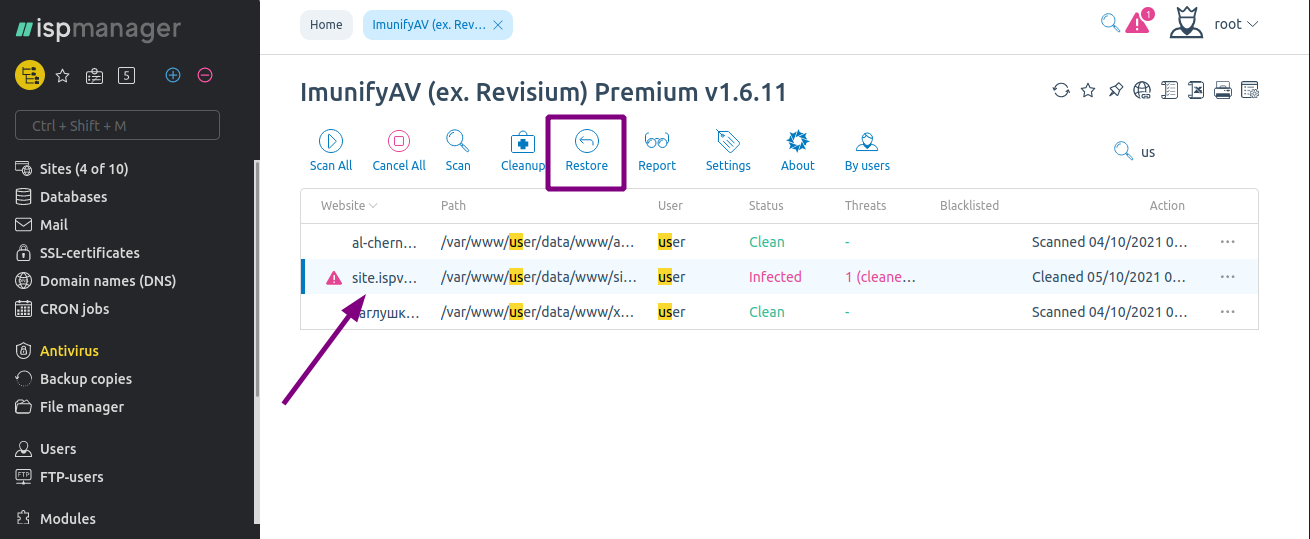
Before treating infected files, the antivirus creates a backup copy of them. So if your website stops working correctly after the treatment, these copies will allow you to undo the changes made and discover the causes of the problems you faced. The antivirus allows you to roll back the changes for the entire user/domain, or for separate files.
If you want to cancel the treatment of a user or a website:
- Select the website or user where you want to cancel the treatment.
- Click on the
Restorebutton.
To cancel the treatment of a specific file:
- Select the website or user where you want to cancel the treatment.
- Click on the
Reportbutton.
- Select the file you want to restore to its original state and click on the
Restore Filesbutton.
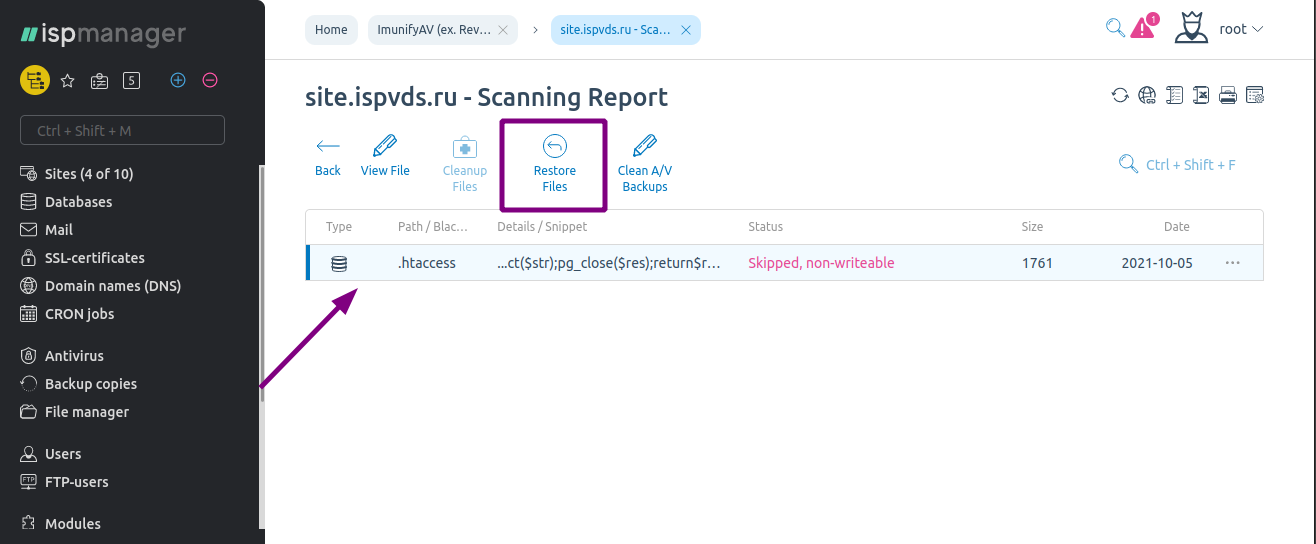
Copies of files made before starting the treatment are stored in a temporary directory /usr/local/mgr5/var/raisp_data/backups/
Checking domains for sanctions
The antivirus can check domains' reputation automatically during the check if this option is enabled in the settings. Domains' reputation is checked in accordance with the «black lists» of Google, Yandex, Roskomnadzor, more than 50 other antivirus services, and phishing pages lists.
